Have a Question?
Payables
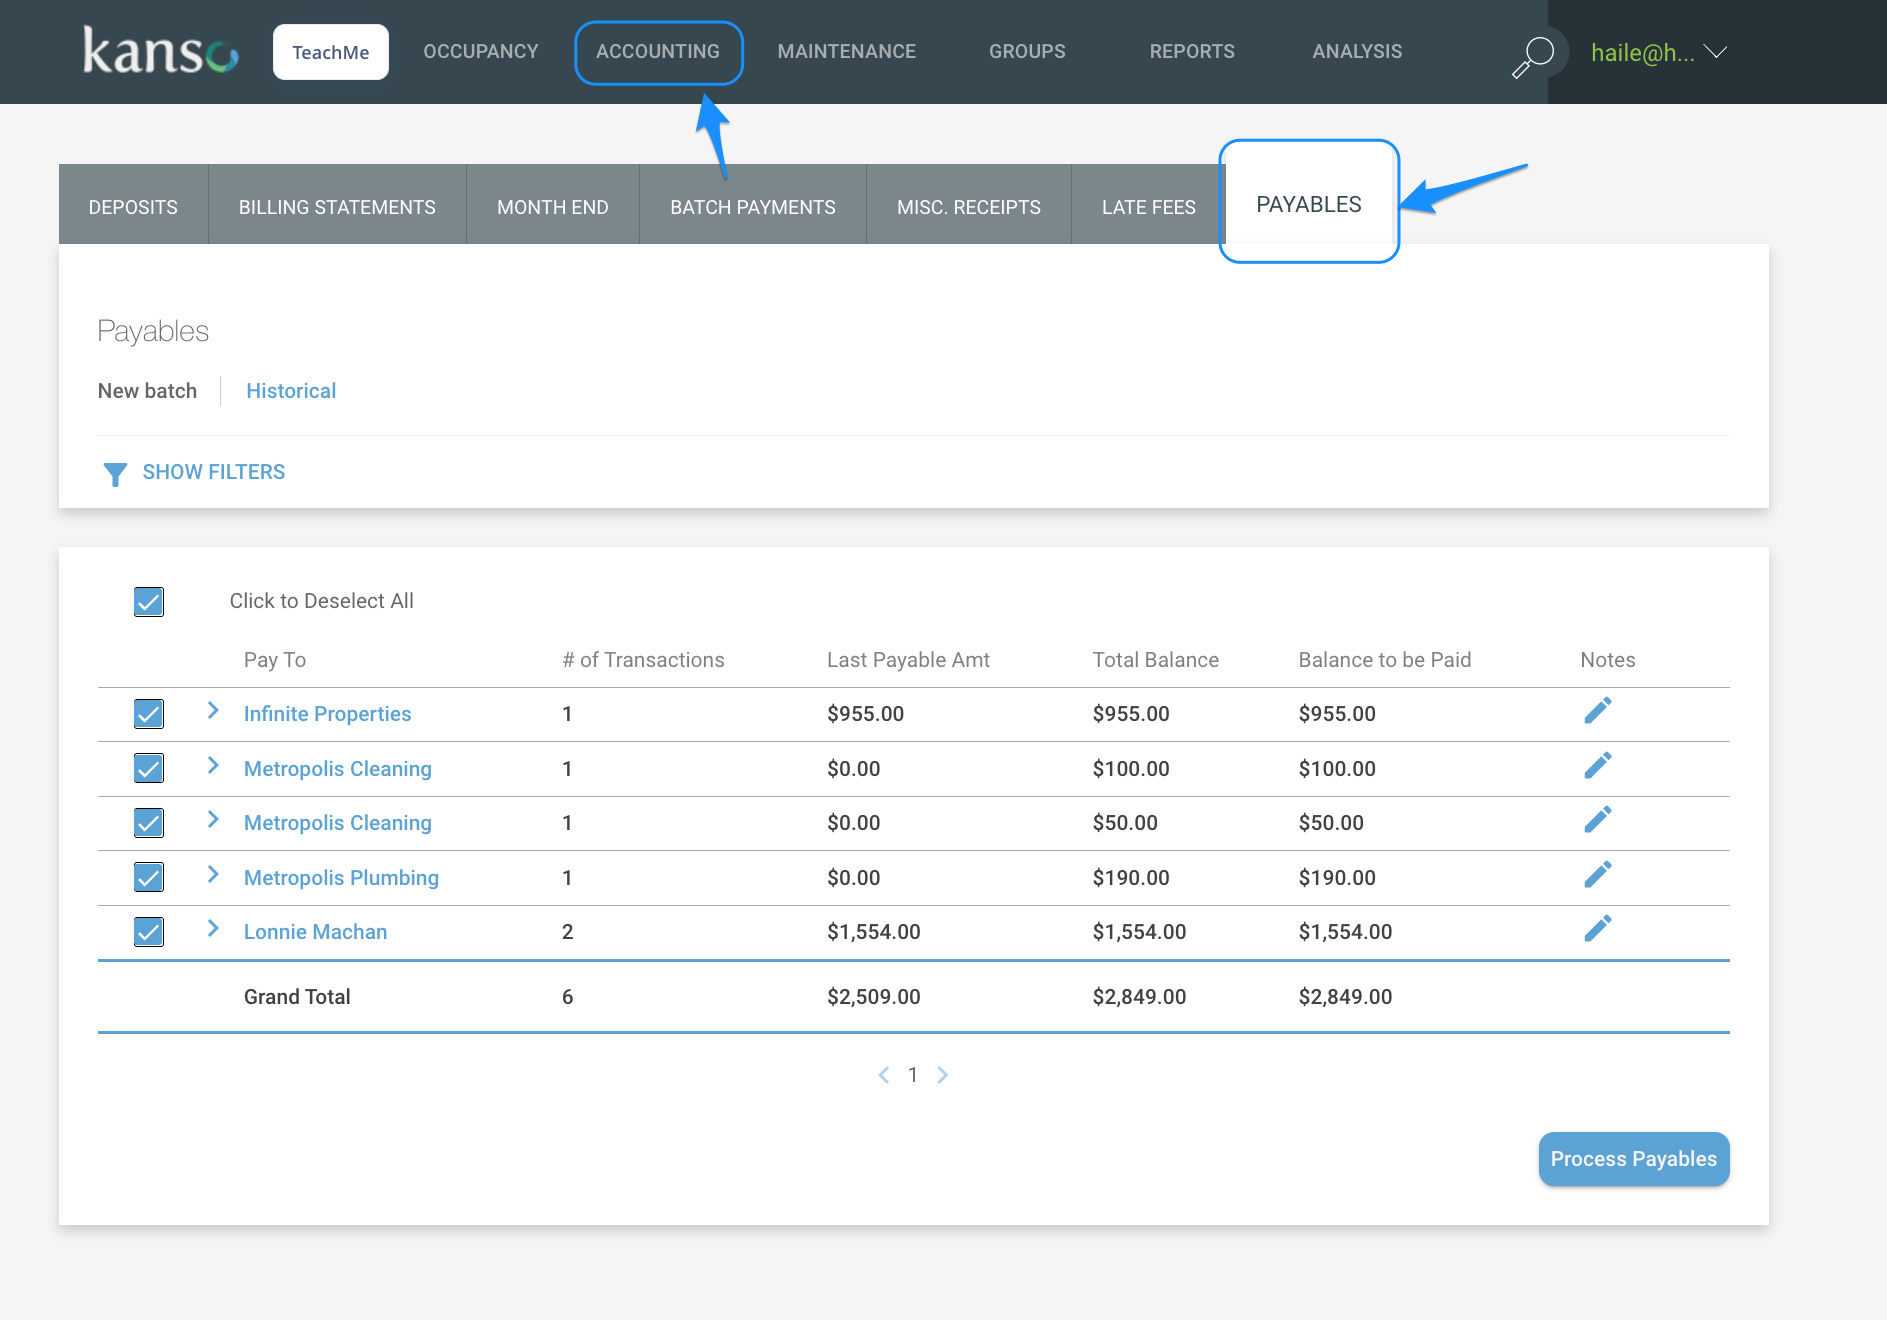
Kanso has the ability to process any Payables owed to vendors via our streamlined payables processing system under the Accounting section of your Kanso site. To navigate to this page, click “Accounting” in the header navigational bar and then click the “Payables” tab.

Overview
When initially navigating to the payables screen, you are met with a list of vendors with any outstanding payables to be paid. The list includes the vendor “Pay To” name, # of transactions outstanding, last payable amount, total balance, and the balance selected to be paid.
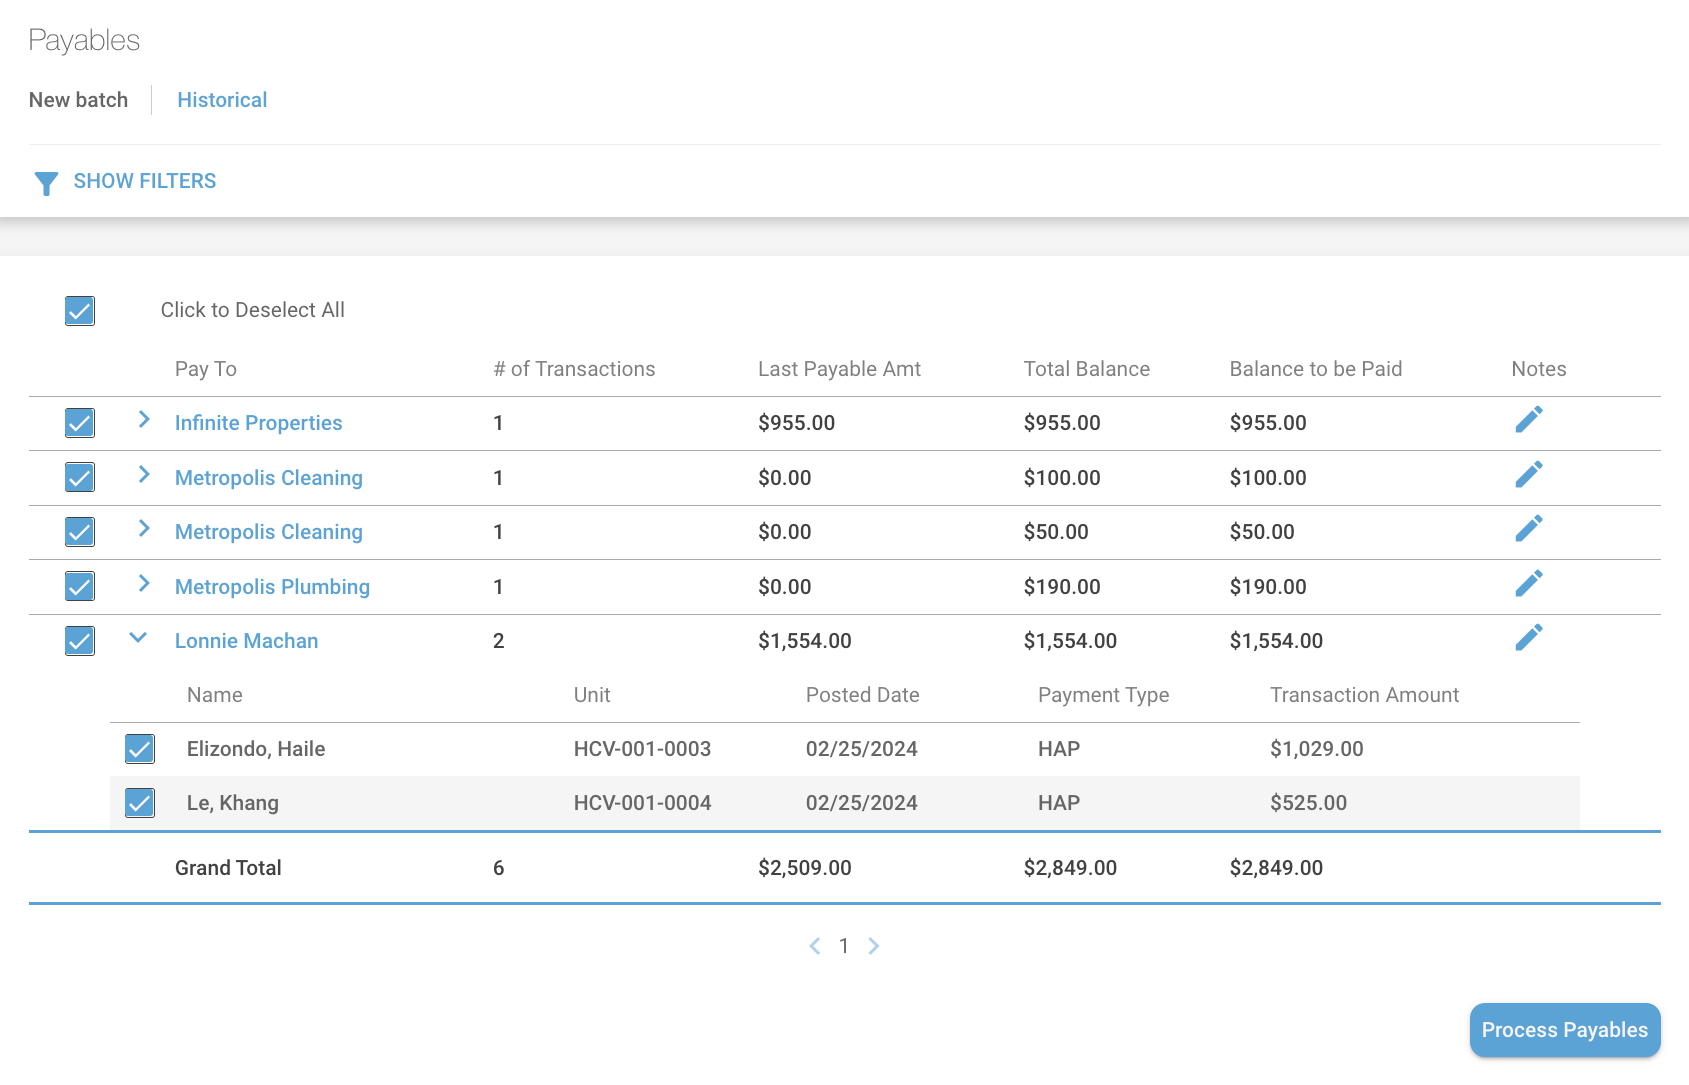
From this view you can click the notes icon for each vendor to review any vendor-specific notes, or you can select/deselect the vendor from the batch before processing. To further review the transactions that make up the payable amount to be paid, click the “>” icon to expand transaction details. Within the details screen, you can view each household and/or transaction that needs to be paid. The details that display include; Name, Unit, Posted Date, Payment Type, and Amount. You may deselect/select individual transactions before processing as well.
You can further adjust the list of vendors displayed by utilizing the filter functions. Click the “Filters” icon and adjust based on Payable Type (Landlord, Utility, Maintenance, Other), by Program, or by the Vendor’s payment preference.


How to Process Payables – “Check Writing”
Once the list of Vendors to be paid has been assessed, and you are ready to begin processing, click “Process Payables”.
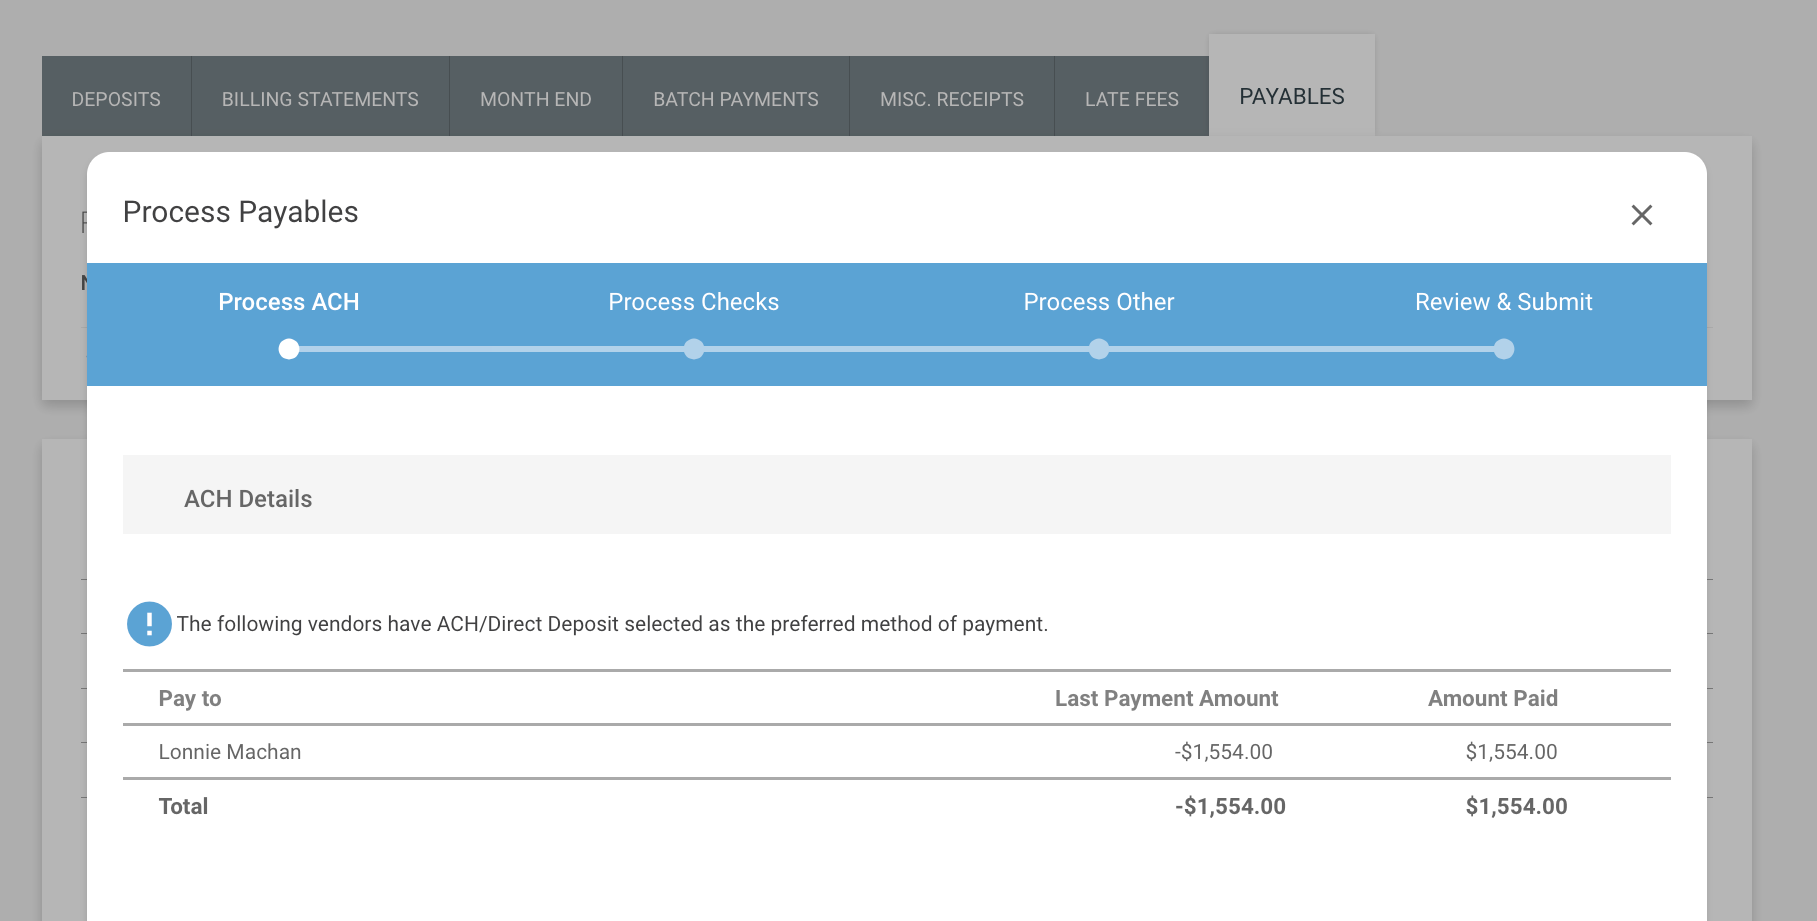
The payables processing feature will be launched:
- Review any payables to be exported via ACH NACHA file. This step will display all vendors who are setup to receive payment via ACH.
- Review any payables to be exported via Check. This step will display all vendors who are set up to receive payment via Check.
- Review any payables to be exported via CSV or “Other”. This step will display all vendors who are set up to receive payment from another system that the CSV will be imported into.
- Review & Submit Final Totals.

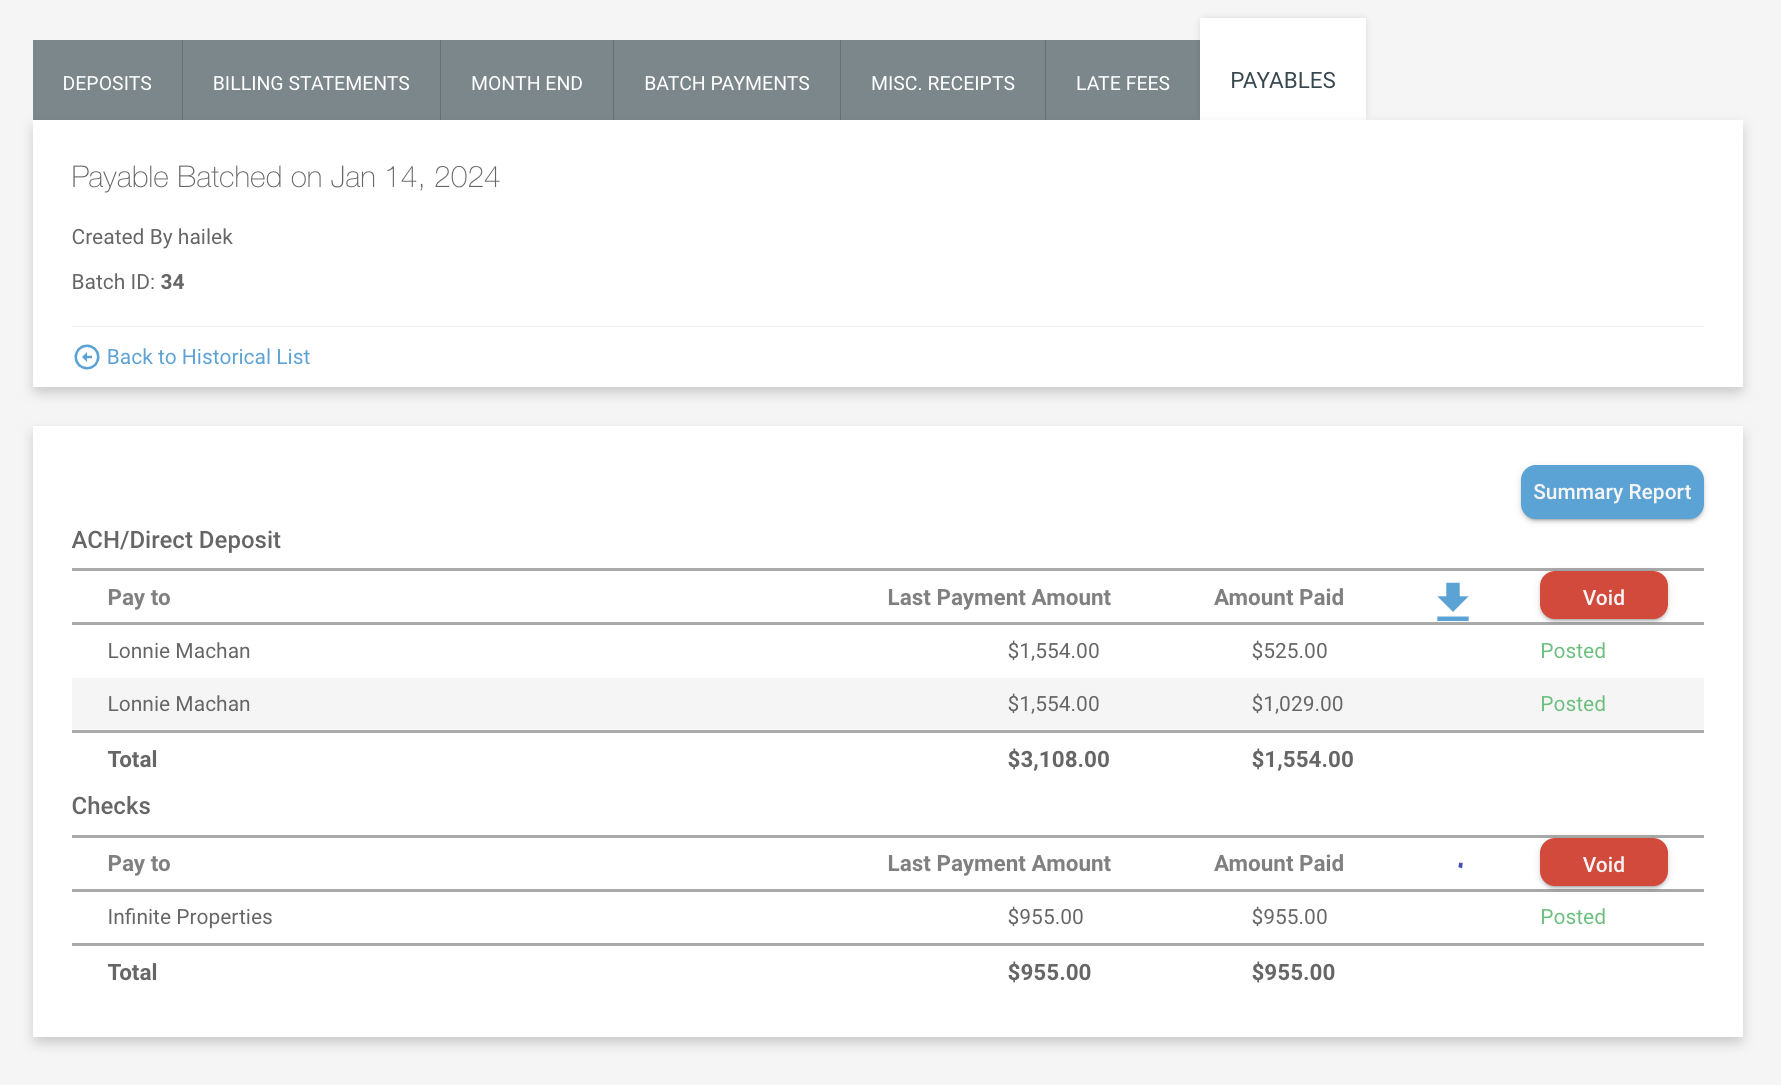
Now you will have a historical record of the batch of payments to be made to vendors. To find the batch, click Historical from the Payables list view, and select the batch. Then you can download the ACH file, Check files, and CSV export to be processed. Once all payments have been processed by your accounting department, you can click the green “Post” button to initiate an automatic offsetting debit adjustment to post to the vendor’s accounts.
From the historical view, you can also void payments so that they return to the payables to made list view. Simply click the red “Void” button.
To view a summary report of the transactions in the payable batch, click the “Summary Report” button. You will be navigated to the reporting application with the selected batch filtered. You can change these filters while in the report to further adjust.

