Have a Question?
Enrollment
An enrollment action registers a specific household into an assistance program.
Step-by-Step Guide to Enrolling a Household:
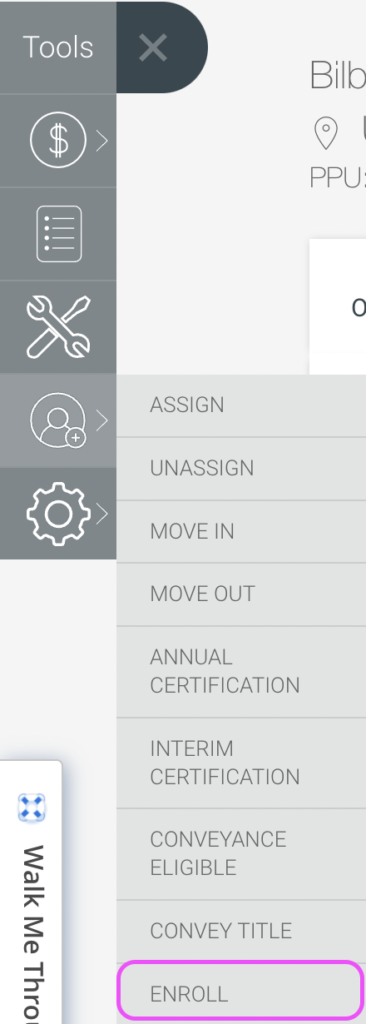
- Click the Toolbox tab on the left-hand side of the page in the household overview.
-
This will bring up a list of tools. Hover your mouse over the “household actions” symbol and a drop-down menu with options will appear. Click “Enroll” at the bottom:

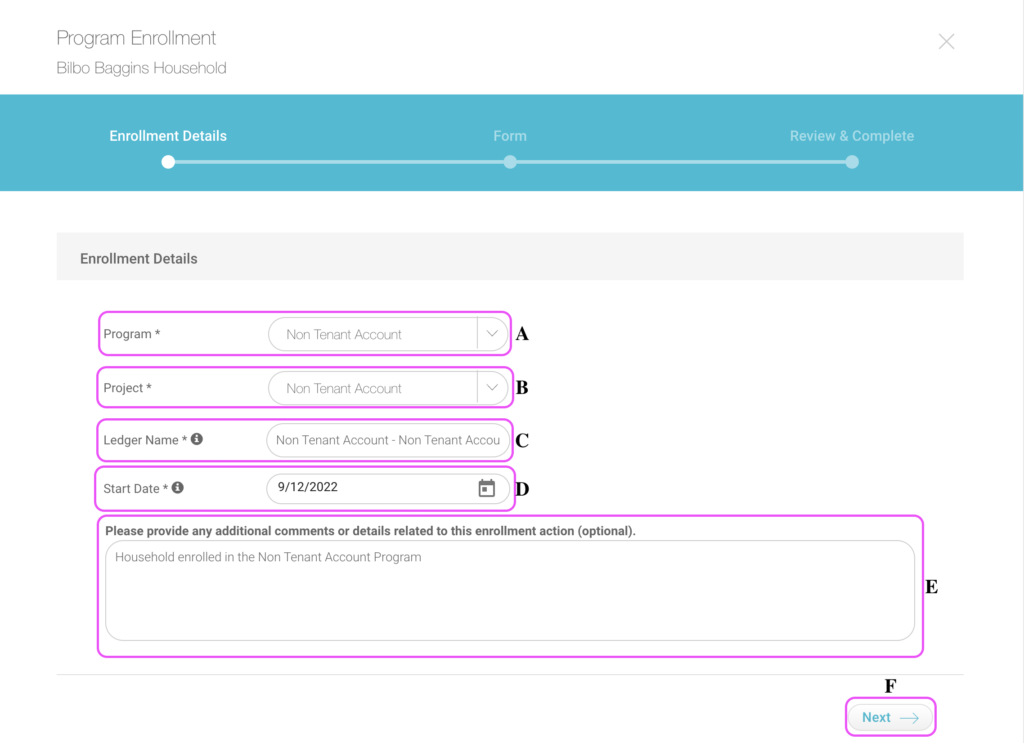
- The following Enrollment Wizard will appear with the Enrollment Details:

- Program: Click the dropdown (carrot) to select the program you would like to enroll in.
- Project: Click the carrot to select the project you would like to enroll in.
- Ledger Name: Type the name of the ledger associated with the enrollment. This is what you will see on the tenant ledger.
- Start Date: Click the calendar icon to open the date picker and select a starting date.
- Comments: Click the box to type any additional comments.
- Next: Click here to continue.
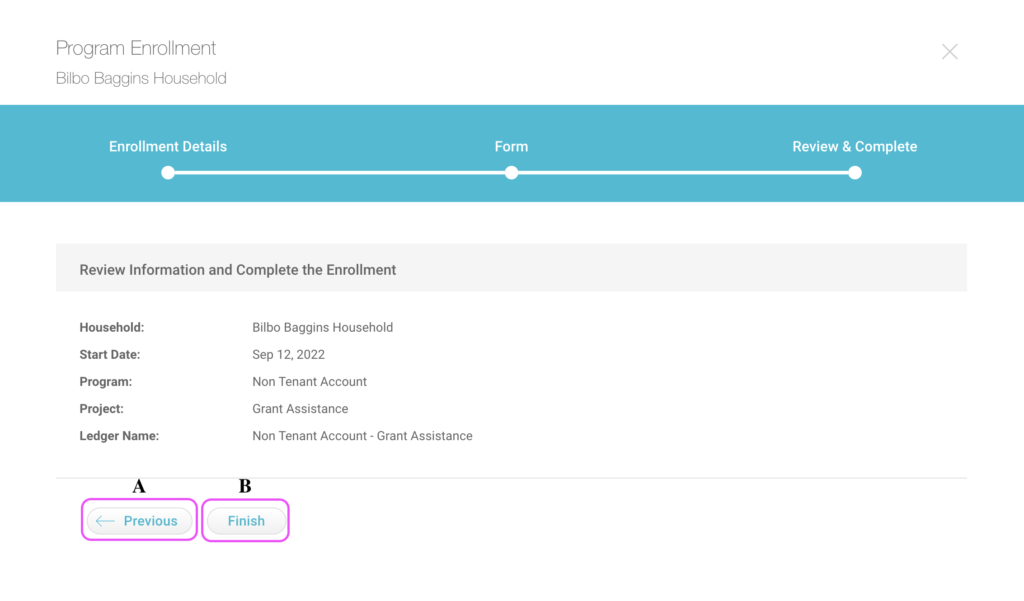
- The following Enrollment Wizard will appear to verify the Enrollment Information:

- Previous: If the information is incorrect, click “Previous” to edit the enrollment.
- Finish: If the information is correct, click “Finish” to submit the enrollment.
- You have successfully enrolled a household into a program:
View Enrollment History:
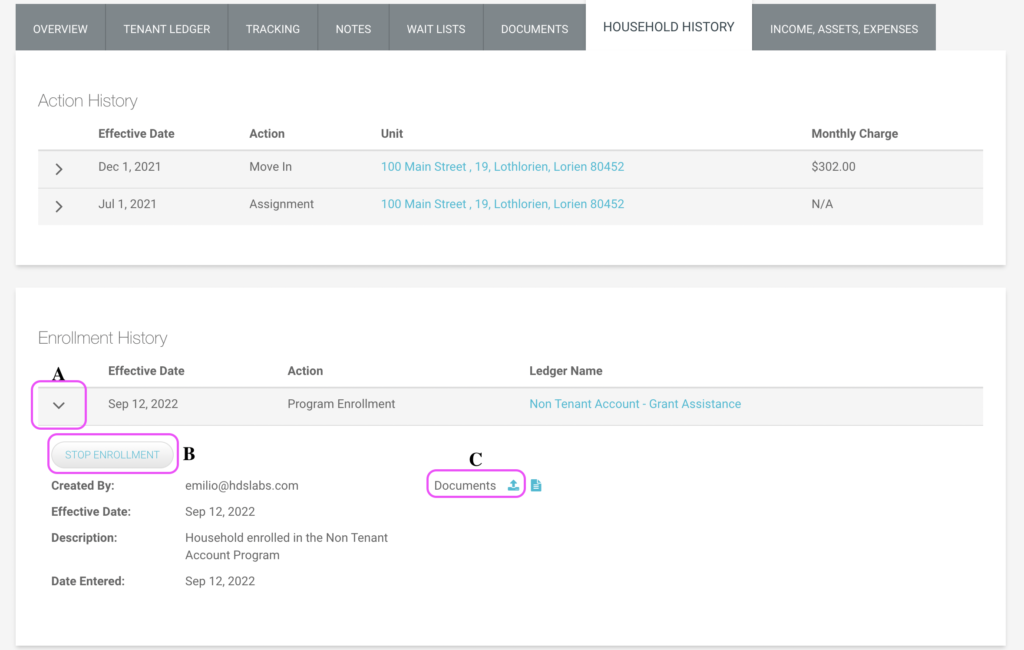
To view enrollment details after a household was successfully enrolled, click the “Household History” tab at the top of the screen:

- Details: Click the “V” dropdown to view details.
- Stop Enrollment: Click the blue “Stop Enrollment” button to cancel a household’s enrollment in a program.
- Upload Documents: Click the blue documentation button to upload enrollment documents.
