Have a Question?
Vendor File
Vendor File
Navigation Path: Login> Doorways Homepage> Occupancy> Vendor
Our Vendor File feature is a live directory of all vendors the HA wishes to track accounts payable, and for portability purposes, accounts receivable (Port-in reimbursements for example). Vendors AP (Accounts Payable) accounts allow for adjustment transactions only. Any credit adjustment within the ledger will result in a payment from the Housing Authority when processing payables in the form of ACH, Checks, or General Ledger export for processing from a separate accounting department.
There are 4 Vendor types within Doorways. (Landlord, Utility, Maintenance, Other).
- Landlord – This vendor type is used to track landlords of units that are owed HAP or any other payables associated with an assisted tenant living within their unit.
- Utility – This vendor type is used to track utility providers of a unit that are to be paid utilities as a part of assisting a tenant living within a unit that is serviced by them.
- Maintenance – This vendor type is used to track maintenance work. As of June 2024, there is no automatic connections between the vendors associated with labor, material, mileage etc costs on a work order. Instead, the user closing out a work order should post a credit adjustment to the maintenance vendors leader associated with the program funds used for payment to initiate payable processing. Additional enhancements to this will be coming soon!
- Other – This vendor type is used to track everything else! Any vendor that your organization must make payments to and track accounts payable, this vendor should be used. Examples could be landscapers, cleaning companies, and more! Simply post credit adjustments to the ledger of the vendor, and the payment can be made through our payables feature.
Vendors Directory
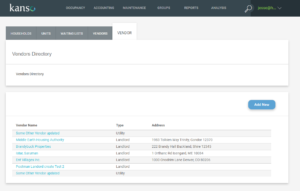
Once on the Vendors Directory page, the user will see a list of all Vendors that have been added to their directory here. Up to 15 vendors a page will be displayed, once there are more than 15 vendors, the additional vendors will be listed by page # at the bottom of the Vendor list. The user can select any page number they want to navigate to.
There are 3 fields displayed for each vendor listed. (Vendor Name, Type, Address).
The Vendor name is a selectable link. When selected, the user is sent to the Vendor Overview page.
Add New Vendor
An “Add New” button exists in the top right corner of the Vendor Directory list. When selected the user is presented with the “New Vendor” pop-up and can add a new vendor to their Vendor Directory.
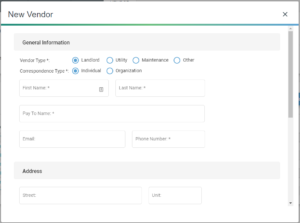

Here the user is presented with 4 categories to fill out about the New Vendor. (General Information, Address, Other Details, Custom Attributes)
The user must enter information in the mandatory fields presented in the “General Information” category.
Address, Other Details, and Custom attributes are not mandatory to fill in to create a new vendor.
Vendor Overview Tab
Once a Vendor is selected, the user is taken to the Vendor Overview tab. Here the user can see all Vendor information available, edit vendor information, add notes, and custom attributes.
Overview Section
The vendor details are displayed in the top overview box. The vendor’s name, type, phone number, email address, Tax ID, Vendor ID, and preferred method of payment are all displayed here.
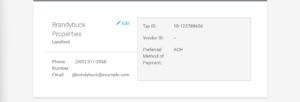
An “edit” button is presented to the right of the vendor’s name to enable the user to edit the vendor’s information.
Notes Section
In this section, the user can add as many custom notes to the vendor as they would like. When selecting the “+” icon in the right-hand corner of the section heading, a “New Note” pop-up will appear.
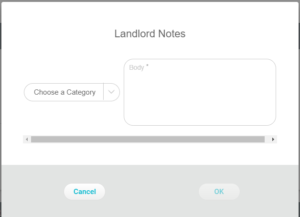
The title is being changed to say “Vendor Notes”. Here the user can select a category and write in the body of the Note to be saved.
Custom Attributes
There is one field that can be added here. “Other Number”. This can be added or edited using the “edit” button in the top overview section.
Vendor Ledger Tab
The Vendor Ledger Tab shows a live up to date ledger for the vendor selected. The Vendor name and address are displayed at the top of this page. The Vendor name and vendor type will be displayed above the ledger.
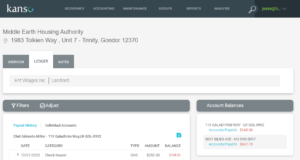
Post Adjustment
To post an adjustment the user must select the “Adjust” button at the top of the ledger. Once selected the user is shown the “Post Adjustment” pop-up.
An “adjustment” can be thought of as a payment to the vendor.
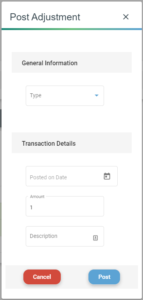
Here the user can select the “Type” of adjustment (Check issued, Hap, Cash, ACH)
The user can select the date the adjustment is posted on.
The user can enter the amount of the adjustment.
The user can add a description of the adjustment.
A “Post” button exists to post the adjustment once the user is ready.
A “Cancel” button exists to cancel the adjustment if need be.
Filters
The filters button allows the user to filter the vendor ledger by either “charges” or “adjustments”. One other option exists to include voided transactions.
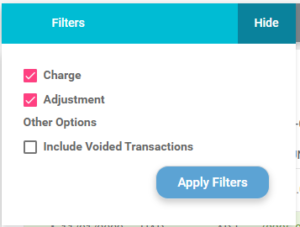
Once the user selects the options they want to filter by, they can select the “Apply Filters” button to activate the filters.
Vendor Ledger
The Vendor Ledger shows all charges and adjustments made to the Individual account selected. Some residents may have balances at multiple locations. The user can select between “Payout History” and “Individual Account”. Payout History will be coming soon.
Individual Accounts
When an account is selected the head of households name, street address, and PPU are displayed at the top of the ledger.
Accounts can be toggled by selecting an account within the “Account Balances” widget.
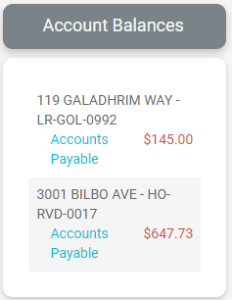
This widget is found to the right of the ledger. This will all AP accounts with balances. The user can select an account to open the ledger. The selected account is highlighted with a white background. Non-selected accounts are highlighted in grey.
Once an account is selected, within the Tenant Ledger, 5 categories are displayed to the user for each transaction line. The ledger will show all available transactions for the account selected.
(Date, Category, Type, Amount, Balance)
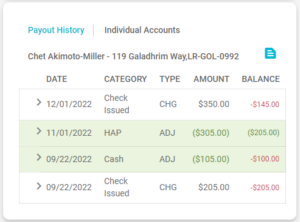
Additionally a generate Vendor Ledger Report button exists to the right on the tenant name, address and PPU. When selected a generate report wizard will open and allow the user to print a full report of the Vendor ledger. This button is not working yet and is coming soon .
![]()
When a transaction line is selected the transaction line will open to display additional information.
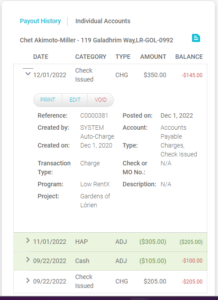
The 10 additional fields displayed to the user are:
Reference #, Created by, Created On, Transaction Type, Program, Project, Posted On, Account, Type, Check No or Mo No, Description
An additional 3 buttons will also become available to the user.
- Print- This will print the individual transaction.
- Edit- Available editable fields will become editable.
- Void- The transaction can be voided.
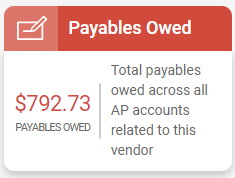
Another “Payables Owed” widget exists on the right hand side of the Vendor Ledger screen. This widget shows the total payables owed across all AP accounts related to the selected vendor.
Vendor Notes Tab
Here the user can create any custom “Notes” when would like to leave on the selected vendors account.

The user can add a Note by selecting the “Add Note +” button. Once selected the user will be presented the “New Note” pop-up.
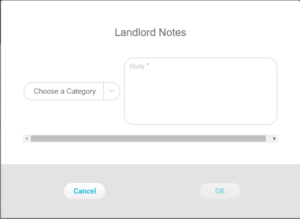
The user can select a category for the note and enter the notes text in the body field. Once text is entered the “OK” button will become active and the user can save the note. Once the Note is saved, it will appear on the Notes home screen.
Each Note saved will display the user the note was posted by, the users profile picture, the date the note was posted on, the body of the note and a “Delete” button.
